Saturday, 19 May 2007

The Dog Hot


Would you check this out! This is one serious hot dog, but wait it's not your usual hot dog. It's what I call a Dog Hot! Every mouthful encapsulated in fresh bread and it's hot all the way through. That's why I call it a Dog Hot! P.S. don't burn your tongue ;)
For the Bread Dough
  • 5 cups Bread Flour
  • 500 mls of Water
  • 2 teaspoons of Dried Yeast
  • Passion with a love of Hot Dogs
Place all ingredients in a good stand alone mixer, attach dough hook and mix for a good 4 - 5 Min's on slow speed. Stop mixer and touch dough with finger tip. If it is sticky add a little more flour and mix until combined well. Keep testing as needed. When your finger comes away from the dough without it sticking you have finished. Pull from mixer and knead on a floured surface by hand for a couple of Min's. Then place on a lined baking tray on top of warming oven at 200 degrees. Cover with a tea towel and leave to rise for 30 Min's.
Once risen place dough on a floured surface. Don't worry if it seems really soft, stretchy and sticky a bit. Give it a quick Knead and roll out into a very large rectangle.
Basically use your imagination and create the Dog Hot of your choice. I filled mine with cheese, half mix of grated tasty and mozzarella, grilled bacon, caramelised onions, skinless Frankfurt's, tomato sauce and American mustard. After you have filled them like the photos above, roll them into a large sausage shape encapsulating all of the filling. Then cut into Hot Dog length rolls. Place in a lined tray snuggled up together. Brush with a little milk and top with sesame seeds. Bake in an oven for 35 Min's on 210 degrees Celsius. Then turn off your oven and allow to sit in the remaining heat for 15 Min's. Then eat at will. Fantastic, the kids loved them and my biggest fan David ate 2 and a 1/2 of them. I planned these out in my head a couple of days ago and I am really glad that they turned out so well. Would be great party food to, cut into small dogs for finger food.

Monday, 14 May 2007

Rejuvenation


Hello Everyone,
Just thought I would let you all know, I have given my blog a little makeover. There are some new pictures of food and lots of pics of my artwork. So if you usually just check out my most recent post and have not wandered downward for a while, check it out. I try to keep my blog fresh, fun and interesting. So go on, scroll down, yes, all the way down and enjoy ;)
Cheers Amelita

Friday, 11 May 2007

San Choy Bow - So Easy

San Choy Bow is one of our favourite dishes. It is so morish and so refreshing to eat. I love the saucy flavour. This is such a simple dish and is sure to be a favourite for you as well.


Ingredients

  • 2 Iceberg Lettuces, separated into leaves
  • 500 grams of Pork Mince or Beef lean
  • 2 small Carrots, grated
  • 1 tin of Water Chestnuts, sliced and diced
  • 2 large cloves of Garlic, chopped finely
  • 1/2 bunch of Eschallots, sliced, keep separated the white ends and the green top
  • 3 tablespoons of Oyster Sauce
  • 3 tablespoons of Sweet Thick Soy or Kecap Manis
  • Splash of Sesame Oil
  • Salt & Pepper to season


To start in a large pan, fry on a high heat the Eschallot white ends and garlic in some peanut oil with a sprinkling of salt for a couple of minutes. Then add your mince and brown. Next step is to throw in the grated carrots, water chestnuts, oyster sauce, sweet thick soy and sesame oil. Stir and bring to a simmer. Allow to bubble for a couple of minutes until the sauce seems to thicken and look syrupy. Taste for seasoning. Then toss through your green eschallot tops. Your ready to go. All you have to do now is put a big spoonful into a lettuce cup, roll it up and munch your brains out. This is seriously good stuff. Enjoy :)

Thursday, 10 May 2007

My fridge - Completely Naked


OK, so I was inspired to bare all in my fridge from a post on Becks & Posh. They did it and have inspired others to do it, so I thought why not join in. So here it is. Not very exciting. Working our way down from the top. Up there on the left is this little area where I stash my chocolate and chocolate biscuits, but for some reason someone has put some leftover artichoke oil up there. Then there is some sliced cheese just beneath that, garlic cloves peeled, some Turkish delight thins I bought Dave. Now on the same shelf all the way to the right is a jar of tamarind paste, with that I just made some Thai marinade I am working on perfecting. You can see the jars of marinade beneath on the next shelf. Also there are some jars of a Onion, Chili, Apple and Raspberry Jam. It came out more like a sauce, so I am still working on that recipe. Greek yogurt in case I want to make tatziki.
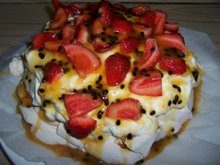
Next shelf there is a giant tub of Kalamatta olives that we are trying to work our way through. Egg whites in that little bag all the way to the right, ready for a pavlova or meringue.
There is beef mince there also, for San Choy Bow, because I have major trouble finding pork mince here. Pork mince is traditionally used for this dish. Looks like I might have to actually use my mincer attachment for my Kitchen Aide. Then underneath that shelf is some leftover foccacia and a bag of mozzarella cheese. In the crisper we have a lettuce, carrots, William pears and chili's.
It's really not that exciting for someone who loves to cook. The only thing I can say is, wait till you see the picture of my pantry. That I think is where my magic happens. I have so many not the norm ingredients that my food is just filled with flavour. There are other things in my fridge that I have not mentioned because I think you can tell what they are. So well then What's in your fridge? Anything out of the ordinary and simply splendid? It is fascinating looking in others peoples fridges, we all have such varying taste buds. We all have our favourite snacking food, we all have a special something expensive ingredient. My expensive ingredient was in the door of my fridge and it is a bottle of White Truffle Oil that I bought in the USA. This with gorgeous creamy mashed potatoes is pure heaven. It is adorable and so aromatic. I have never had the pleasure of eating a fresh Truffle and this is the next best thing. So I hope you have enjoyed my little bare all tour through my fridge? Thought it might be a bit of fun. Cheers Everyone :)

Monday, 7 May 2007

Chocolate Fudge Sauce


How is this for a Banana Split? My kind of comfort food. Every mouthful is just sinful, rich and disgustingly fattening. Bananas, Vanilla Ice Cream, Cream, Toasted Peanuts and of course, the richest most delicious chocolate fudge sauce to top it off. As you can see I love rich food. I am not obese, nor am I an over indulger but these kind of treats just make life a bit sweeter. MMMMMmmmmmmmmmmm
Chocolate Fudge Sauce
Ingredients
  • 400 grams of a good quality dark Chocolate, chopped
  • 2 cups of Cream
  • 40 grams of Butter, real butter no substitutes
  • 1 teaspoon of Vanilla Bean Paste

Pop your cream and vanilla bean paste into a heavy based saucepan. Bring up to the simmer and take of the heat. Then add your butter and chocolate. Stir until the chocolate and butter has all melted through. You should have a thick, glossy, smooth mixture.


Suggestions for other use, great on cupcakes, fabulous as a hot chocolate base - just add warm milk, perfect on top of a pavlova, great for using with fresh strawberries. The possibilities are endless. So Easy :)

Saturday, 28 April 2007

White Choc, Pecan and Mango Cookies


Cookies, mmmmmmmm gotta love cookies.
These are so good. The white chocolate, dried crystallized mango and pecan nuts, make for a sensational taste combination.
This is based on a Mrs Fields Cookie recipe with a little change to it, the mango. Go for it!
  • 2 & 1/4 cups of Plain Flour
  • 1 tsp of Baking Powder
  • 1 cup of Brown Sugar, firmly packed
  • 1/2 cup of White Sugar
  • 250 grams of Salted Butter, softened
  • 2 large Eggs
  • 2 tsp of Vanilla Bean Paste
  • 1 cup of Pecan Nuts, chopped
  • 1 & 1/2 cups of White Chocolate Melts
  • 100 grams Dried Crystallized Mango, chopped

Preheat oven to 180 degrees Celsius. In a medium sized bowl combine flour, baking powder and salt. Mix well with a whisk. Set aside.

In a large bowl with an electric mixer or freestanding mixer blend sugars and butter on a medium speed until well combined. Add eggs and vanilla bean paste, beat at a medium speed until well combined. Add the flour mixture and beat on a low speed until just combined. Then stir in pecans, mango and white chocolate by hand.

Drop rounded tablespoons of cookie dough onto a lined tray. Bake for 15 to 20 minutes or until edges just begin to turn golden brown. Transfer cookies to a flat surface to cool. Makes roughly 36 cookies. Enjoy :)

Wednesday, 25 April 2007

Rainforest Inn Paluma

After we finished admiring the sheer beauty of Little Chrystal Creek we headed further up the mountain to Paluma Village. The scenery was breathtaking. We were all famished. We found a great new restaurant located in the heart of Paluma Village. Rainforest Inn Paluma, 1 Mt Spec Road, Paluma, 07 4770 8688. They also have accommodation for your comfort and a nice break if you wish. They only opened in November last year. The food was sensational. The Chef there puts on a fabulous lunch that we had trouble finishing due to the huge portions. The interior is very comfy with big couches in front of the fire. Yes a fire in North Queensland. It is quite cool up there on the mountain.


The lovely Jeffrey King is the Chef of this welcoming place and he has an excellent flair for food. Ben and Jared ate Beef Nachos which were massive servings, David and I had an open faced Steak Burger, lovely Fries with Garlic Aioli and the burger had an American Style BBQ sauce, with I think it was Hickory Smoke Liquid. Maddy had a gorgeous Toasted Chicken Wrap which was huge and tasted fantastic. Aliesha and Peanut had the kids meal of Chicken Nuggets and Chips, their personal fav. I snapped a picture of Jeff just as he was picking fresh herbs from his garden. That's what I like to see Jeff. And no that's not a cigarette hiding behind his back, Wink Wink. All of us Chefs seem to smoke. We are very naughty. Even the famous Chef Ben O'donoghue smokes. The Chefs on Top Chef and Hells Kitchen smoke also. I do to, I am a very bad girl and I am sure you are all going to slap me silly. Especially Clare Bear.


The journey home was beautiful. As you can see from these gorgeous photos. If you get a chance stop in and have some lunch at the Rainforest Inn Paluma. You won't be disappointed.
Cheers Amelita.


Saturday, 21 April 2007

Szechann Rack of Veal with Szechann Pepper Cream Sauce


I love meat with some kind of heat to it. It truly makes you feel warm inside. We all loved this dish. It was a sexy plate licking dish. I am just drooling with the thought of it. This is seriously sexy food. The sauce is spicy and hot with the cream just taking the edge off the heat. The sweet potato and pumpkin puree is sweet and luscious and compliments the sauce and veal completely. Not bad for a Sunday roast huh? This is what happens when the red wine flows through my veins. I am absolutely adoring a gorgeous Margaret River 2005 Cabernet Merlot Clean skin I have bought a few bottles of. I am seriously thinking of going and getting a case now. So smooth and easy to drink. You know, one of those bottles you make sure you get the last drops out. Or is it only me who does that. LOL Probably just me. Back to the veal.
  • Ingredients
  • One Rack of Veal
  • Szechann Peppercorns
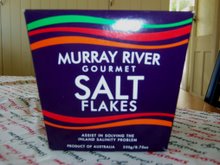
  • Sea Salt Flakes
  • 1 small piece of Butternut Pumpkin, skinned and cut into pieces
  • 1 medium sized gold Sweet Potato, skinned and cut into pieces
  • Knob of Butter
  • For the Sauce
  • 500ml Cream
  • 2 Cloves of Garlic, chopped
  • 1 large Brown Onion, chopped
  • Salt Flakes, for seasoning
  • Dash of Worcestershire Sauce

To start the veal, crush Szechann Peppercorns in a Mortar and Pestle with a big pinch of salt flakes. Rub the peppercorn mixture all over your lovely veal rack. Preheat your over to 180 degrees. In an oven proof fry pan add a knob of butter and a splash of olive oil. Sear the veal rack on all sides on a high heat for a couple of minutes to create a nice crust on the outside. Then place the veal rack strait into the oven, fry pan and all. Allow to cook for 25 to 30 Min's.

While the veal is cooking. Steam your sweet potato and pumpkin until nice and soft. Once soft keep aside in a saucepan with the lid on to keep the heat in. When your veal has cooked, pull out of the oven, take the rack of veal out of the fry pan and allow to rest. In the same fry pan you used to cook your veal, add a little more butter, fry the onions and garlic until translucent. Remember to keep all of the residual juices and bits of peppercorn from the veal in the pan, as that is the base to the sauce. Like when you make gravy. Now add the cream, dash of Worcestershire sauce and allow to simmer. Finally for the sauce, a pinch of salt flakes and some more pepper if you like.
Lastly puree the sweet potato and pumpkin with a knob of butter, a splash of cream, salt and pepper. I use a hand blender. To reheat just pop back on the stove for a minute or so stirring all the time. Cut your veal into cutlets and assemble. First with a big dollop of sweet potato and pumpkin puree, then the veal and lastly spoon over the sauce. This is divine. Serves 4. Enjoy :)

Saturday, 14 April 2007

Little Lizards


I find this artwork quite intriguing and wondered whether all the lifeguards do this. Draw pictures of scary crocodiles when there is a sighting. You tell me? Looks like a large lizard rather than a crocodile. Is this drawing meant to scare our tourists who can't understand English. Watch out for lizards tourists from other lands, the little lizards are coming. If you compare the size of the sand granules to the actual drawing of what is supposed to be a scary crocodile, then that's one microscopic lizard you have to beware of. Now I am sure the lifesaver tried very hard to make him look scary but I don't think he does, do you?
At first I thought a child drew that as a joke. But then I thought no, they are always closing the beach down there because of salt water crocodiles. So there you have it. A very scary looking little lizard to warn the tourists. I worry for our tourists you know. They are always getting themselves in trouble over here in our gorgeous country, and now I understand why. Australia can sometimes be quite confusing for them.
Cheers Amelita

Little Crystal Creek

So we went out for a day trip in the car before JD and Miss A went home to their mother. We decided to go up to the rain forest just 40 Min's north of here. Our first stop on the way was here, little crystal creek. This place is just beautiful. My goodness the rain forest was sensational and the views of the mountains just made me feel so relaxed in awe. To top it off little crystal creek to me is not a creek, it's a perfect set of waterfalls big and small. The man made stone arch bridge was gorgeous. It was like a scene out of a movie, a place I never knew I would see.
The pictures just do not do the experience justice. You have to be there to understand how amazing it is. No words can describe the feeling this place creates in your soul.
I imagined seeing a horse and carriage stroll across this bridge. The place really is nearly untouched. The pathways and bridge feel like they have always been there.
You are surrounded by the biggest trees that have the most amazing ferns hanging from them. Dark green moss grows on any spare patch it can hang on to.

I urge anyone to visit this simply beautiful place. You can't tell be the pictures but there is a light drizzle of rain falling while we are there and it makes for a brilliant atmosphere.
Little crystal creek is on the edge of the Hervey Ranges, along the way to Paluma village. North Queensland is such a beautiful place and I live here. How lucky am I? I feel so grateful to the powers at be that have nudged us in the North Queensland direction.

If you ever come and visit North Queensland make sure you stop by and enjoy this place.

Cheers Amelita
XoxoxoX

Friday, 13 April 2007

Banana Pancakes with Bacon & Maple Syrup


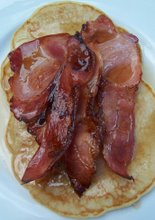
The first time I had bacon plus maple syrup on pancakes was in the US. I thought it was strange. But I am always up for new things. They are so delicious and so yin and yang, sweet and salty, and all that JAZZ. You get the picture. I have become addicted to them. On a Sunday morning all of our family just can't resist a hot brekky. It's a must have. Even in summer and yes in Tropical Queensland. This Easter Sunday with everyone here was a good reason to indulge in some extra fat molecules. Since our move, two of our midgets have been in Brisvegas and come up here on school holidays. So it has been just awesome having them home again. They took their first plane trip and I was jumping up and down with excitement as they waddled down to the gate to get off the plane. All seven of us together again. I think everyone else thought we were a pack of wild monkeys Oo Oo Oa AAAAAA. Sorry, I digressed yet again. Back to the pancakes. I had some bananas that were looking really ripe and the kids won't touch them when they look like that. So banana pancakes it was. We demolished them. So I hope you do to? I am getting hungry again just looking at the picture mmmmmmmmmmmmmmmm
Ingredients
Lots of crispy Bacon
Maple Syrup
For the Pancakes
3 cups of Plain Flour
3 Eggs
3 cups of Milk
1 teaspoon of Vanilla Bean Paste
2 mashed large Cavendish Bananas
Pinch of Salt
Simply whisk all the pancake ingredients together. It's that easy. Butter your fry pan or flat grill on a medium to high heat. Place a big dollop of the pancake batter in the pan. Cook until golden on one side and bubbly on the top side. Then flip. Cook for a minute or so longer and your done. Once all the pancakes are cooked assemble the crispy bacon on the top of them and pour on the Maple Syrup goodness. Ahhhhhhhhhhhhhhhhhhhhh............ yummo.
Tips
Grill your bacon in advance and place on a tray, in a warm oven. Same with the pancakes when you are making them, just pop them into the oven to. Keeps everything warm and assembly is quick smart. Cheers Amelita :)

Monday, 9 April 2007

Pan Fried Salmon on Mash with Hollandaise


Ingredients

2 pieces of Salmon, skin on of course
Mashed Potato, the way you like it.


For the Hollandaise


3 tbsp White Vinegar
Ground Course Black Pepper
125 grams Melted Butter
6 Large Egg Yolks
Good Pinch Salt Flakes
1/2 Lemon Juiced
Love

Reduce vinegar with black pepper in a small saucepan until about 1 tablespoon is left. Melt butter and allow to sit for a minute, so that it separates. Place the 6 egg yolks into a clean mixing bowl and whisk together with vinegar, until fluffy. Then pour the melted butter in a thin stream while you continue to keep whisking on high speed. Leave the remaining solids from the butter in the jug. Try not to get to much in the sauce when pouring. Whisk in the lemon juice and salt. Taste for seasoning.

Once your mash and hollandaise are set to go. In a hot fry pan with a good knob of butter and a splash of olive oil, place the salmon skin side down and fry for about 3 Min's. You want the skin to be crispy and golden brown. Turn the salmon and season with salt and pepper. Fry for a further one minute and take the pan off the heat. Allow to sit in the still hot fry pan, for a further 5-7 Min's. This will finish off the cooking and will not overcook the salmon. While the salmon is resting, reheat your mash in a saucepan with an extra dollop of cream and a good knob of butter. Don't you just love recipes that have cream and butter in them? Love the flavour. Then all you have to do is assemble on the plate. Place a big spoonful of mash in the centre of your plate, top with the salmon skin side up. Then last but not least, dollop with as much hollandaise as you like. I like lots. This is a lovely dish and everyone I know always licks their plate clean. Naughty, but you gotta love a plate licking dish. Enjoy, serves two.

Saturday, 7 April 2007

Brilliant Bread


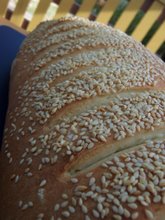
We really have gotten out of the habit of making bread since we moved up here to Townsville. We used to make it every weekend and kind of took it for granted how lovely it is to make our own. The smell of the yeast is just heady and then when it is baking in the oven the whole house fills with an amazing smell. Who needs air freshener when you can bake? I have always been partial to a fresh baked loaf smothered in good old fashioned butter. Crusty on the outside and that incredible flavour of toasted sesame seeds. MMMMMMmmmmmm
4 cups Bread Flour
400 mils Water
2 tsp Dried Yeast
Little extra Milk
Passion
Place all ingredients in a good stand alone mixer, attach dough hook and mix for a good 4 - 5 Min's on slow speed. Stop mixer and touch dough with finger tip. If it is sticky add a little more flour and mix until combined well. Keep testing as needed. When your finger comes away from the dough without it sticking you have finished. Pull from mixer and knead on a floured surface by hand for a couple of Min's. Then place on a lined baking tray on top of a warming oven at 200 degrees. Cover with a tea towel and leave to rise for 30 Min's.

Once risen, place dough on a floured surface. Don't worry if it seems really soft, stretchy and sticky a bit. Give it a quick knead, then form a long log shape. Brush on some milk and then smother with sesame seeds. With a very sharp knife, cut slash marks into the top of the log about a centimetre deep. Then bake for about 35 to 40 Min's. Once golden and crusty, pull out of the oven and allow to cool till warm. If you can wait that long. I never can. Enjoy :)