Sunday 18 September 2011

For The Love of Doughnut Babies!


Ingredients
7g Dried Yeast
3 Tablespoons of warm water
1 1/2 Cups of Luke Warm Milk
1/2 Cup of Castor Sugar
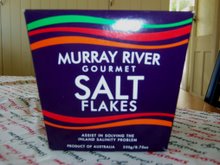
1 Teaspoon of Salt
2 Eggs
75g Butter Softened in little cubes
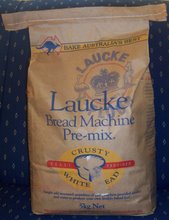
625g Plain Bread Flour + 3 Extra Cups for security purposes
Cinamon Sugar - 2 Cups of Sugar & 2 Tablespoons of Cinnamon
Sprinkle yeast over warm water and allow to sit until bubbly.
In a large bowl or in your mixer with the dough attachment add the yeast mixture, milk, sugar, salt, eggs, butter and half the flour. Mix on low for a few minutes. Scrape down the sides of the mixture and give it a good stir. Add in the remaining flour and mix on low until a dough forms. Now for the extra flour. I have modified this website recipe as it did not come together into a nice dough. I had to add 3 extra cups of flour to get it to come together. I also only used half the butter that they recommended. (I hate it when you google a recipe and it's not right, drives me batty!)
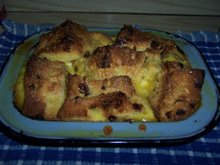
Place the dough in a bowl and cover. Allow to double in size. Then tip it out onto a floured bench, bash out all the air and roll it out like cookie dough. I had it at about 1cm thick. We used cookie cutters dipped in flour to make shapes. But Alex like the little doughnut men so we mostly used those. Keep the bits and pieces left over. I used them to test the heat of the oil and they were just as delicious also. Place them on a lined baking tray and allow them to proof until they puff up like the photo above.
Now for the frying. I used my electric Wok. It was excellent and a great way to keep the oil the right temperature about 175 degrees. I hovered mine between the 8 & 10 setting on the Wok. Use one of the test pieces and if the oil is bubbling away nicely round the edges your set. Once browned to golden on one side, flip them over with a slotted spoon and allow them to brown on the other. Pull them out, drain on absorbent paper and while still hot dump them in Cinnamon sugar. We used one cup of sugar to every tablespoon of Cinnamon.
They were delicious. I had Kids and Husband in toe grabbing them before I could even finish the next batch. Enjoy them!

Sunday 10 April 2011

Knife Skills


When it comes to children and cooking when is the right time to introduce them to a very sharp knife. I asked myself this question this morning when Alex wanted to help me make Bacon and Eggs. His interest in cooking with me has picked up in the last month or so and he is asking me every time I cook if he can help.


This morning I taught him how to use one of my chefs knives. I was nervous, as any mother would be. But he took it all very seriously. I showed him how to hold it, where the sharp bits are and how to carry it. I explained to him about how we clean up after cutting any meat and he washed his own knife and cutting board, under my supervision of course. He really surprised me. At 5 years old there are so many things his little hands can't coordinate yet, but he was quite skilled using a knife.


So I I will be introducing him to allot more things in the kitchen from now on. He's really building an appetite for cooking from what we are going to cook, picking the right produce at the supermarket and how we make it all come together for a lovely meal. So I will keep you updated from time to time on his progress as my Little Chef as I call him.


My next post is an amazing recipe I have been working on. Braised Ox cheeks in a red wine ragout on garlic mash. I'm having a dinner party on the 30Th of April that I am doing 4 courses for.


I have made the decision that posting from now on, due to the limited time I have with work and with children will not be as often as I used to but I want to maintain my food blog so I say it will be every six weeks or so. I hope you enjoy my recipes and continue to come back and have a look from time to time to see what I am up to. Thank you for stopping by.


Tuesday 1 February 2011

Blackberry, Lime, Goats Cheese & Chocolate Crusted Baked Cheesecake


Seriously this is Bloody Awesome, So Yummy, Oh My Happy Aunt!

I took a standard baked cheesecake recipe and turned into something very special. As if baked cheesecake wasn't special enough.

It's not too sweet and not too sour..........it's just right!


Ingredients

  1. 300g Plain Chocolate Biscuits
  2. 100g Melted Butter
  3. 2 x Punnets of Blackberries
  4. 380g Cream Cheese
  5. 120g Fresh Goats Cheese
  6. 200g Caster Sugar
  7. 1 Tablespoon of Cornflour
  8. 3 Eggs
  9. 2 Tablespoons of Lime Juice
  10. Pinch of Salt
  11. 400ml Sour Cream


Preheat your oven to 180c You will need an average size spring form cake tin. Line the base with a double thickness of aluminum foil, then with a layer of baking paper. Clip the spring form tin together with the base and fold the sides of the foil up the side of the pan. This will give you extra security for baking. Brush the insides with melted butter.


Crush the chocolate biscuits in a food processor until nice and fine. Then add the melted butter and process until well blended. Press the mixture into the bottom of the spring for cake tin evenly.


Beat the cream cheese, goats cheese and sugar in a mixer until soft and well combined. Add the cornflour and mix well. Then add the 3 eggs one at a time, mixing in-between each addition.


Add the lime juice, the pinch of salt, sour cream and one punnet of the blackberries. Mix well again, try and get the blackberries to squish a bit so it bleeds their beautiful colour into the mixture. Then just fold through the other punnet of blackberries.


Boil a full kettle of water ready to go. Pour the cheesecake mixture into the cake pan and spread out evenly.


Place the cheesecake into a baking dish lined with a tea towel. Pour enough boiling water into the baking dish to fill half way up the cake pan.


Bake for 50 minutes and then turn off the oven. Allow the cake to stay in the oven for another hour. Do not open the door!


Then take your cheesecake out of the oven and allow it to cool to room temperature. Remove the spring form tin. Refrigerate for a couple of hours or for best results overnight.


This is a cheesecake that does not need to be served with cream or any other embellishment. This one stands alone and proud.

Oh and delicious!!!!


Sunday 30 January 2011

A New Beggining


It has been 20 months since my last post. Where did the time go and what happened? Well you could say that life has taken over! Work has been an undeniable factor in the missing presence of my blog posts.
I've moved from one side of the country to the other. Now in Adelaide, South Australia, Food and Wine Country. So a food bloggers dream come true.
Work has taken over my life and I forgot about my blogging for a while, not because I don't love it but because it was getting to hard. I'll do it tomorrow, I'll get to it on the weekend, but no, I didn't get to it.
So my new years resolution is to go back to it, a new chapter in my life, a new beginning. Of course there is still work and being busy but I have vowed to get back to the old me and do the thing I love . I think I have grown in the last 20 months. I have perfected the Creme Brulee which I will share with all of you. I have achieved some amazing cooking milestones. Those recipes will come out through the next series of posts on this new beginning of mine.
I hope that you will all enjoy this next chapter in my blogging life. So I will see you soon with a new South Australian inspiration. With the amazing quality of food and wine here, the Central Markets one of the best food markets in Australia, the restaurants here, how could anyone not be inspired.
Cheers
Squishy