Saturday, 10 March 2007

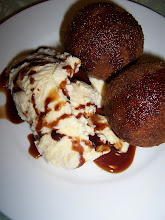
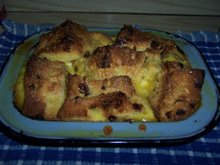
Here's one I stuffed up earlier. Chocolate Pudding.


I think I am having one of those malfunction brain meltdown days today. It started with the fact that I forgot to buy fruit for the chocolate fondue. Then it went to spilling stuff on the floor, on myself and basically any spare patch of clean kitchen anywhere. Ahhhhh Total malfunction. Yes, I to have my bad days in the kitchen and here's one I stuffed up earlier today. It was a simple recipe and I stuffed it. The top went to brown. The inside was not nearly cooked enough, even though it was just starting to burn on top. So what was a girl supposed to do. I jammed a big metal spoon into and gave it a quick fold around. Goeyness and sponge swirled around together. Then I popped it into the oven again for another 5 mins or so, then served with fresh cream. I won't tell you who's recipe I used. I don't think it was the recipe. It was me with a couple to many drinkys under my belty. It tasted good. It was rich, just not right, if you know what I mean.


Also I don't know whether this is a new product or not. But I have noticed, now that I do the majority of my shopping at Woolworths, that their select range has Creamy Tasmanian Butter. It's really good. I have been using it for my Hollandaise sauce recipe and other things. It's really great. Give it a whirl.

Warning

If you are going to drink and bake,

then your a bloody idiot.

Friday, 9 March 2007

Moroccan Chicken with Saffron Macadamia Rice & Passionfruit Yoghurt Sauce


As in a previous post I said that I was going to use more dried spices. This is one of my new recipes, inspired by my new spice range. I hope you all like it. David, Ben, Maddy and I loved it.
Ingredients
  1. 4 cups of Arborio Rice
  2. 500 mils of Chicken Stock
  3. 1 cup of Water
  4. Pinch of Saffron Strands
  5. 1 scoop of Macadamia Nuts
  6. 8 Chicken Thigh Fillets, no skin and no bones.
  7. 1 Large 500 gram Tub of Natural Greek Style Yoghurt
  8. 2 large Passionfruit or 4 small ones
  9. 1 clove of Garlic finely chopped
  10. Salt & Pepper
  11. Moroccan Spice Mix, you can pick that up at any good Indian or Asian Grocer

Sprinkle the Moroccan spice mix all over the thigh fillets an hour before your ready to cook and allow to marinate covered in the fridge.

Your ready to cook. Preheat your oven to 150 degrees. Place your Macadamias in an oven proof dish and toast in the oven. Keep an eye on them you want them toasted, not burnt. I hate nuts with even little burnt bits on the edges. Grab your rice cooker, then add the rice, 500 mils of chicken stock, a cup of water, saffron strands, then give it a good stir, pop the lid on and set to cook.

On to the chicken. Fry the thigh fillets on medium to high heat in a fry pan with a little olive oil. Just browned on both sides. Then place them on an oven tray until they are all done. We are not looking for them to be completely cooked through as we are going to finish them off in the oven. Don't forget to check on your Macadamias. When they are toasted, pull them out and keep aside. Pop your thigh fillets in the oven and allow to cook for another 10 to 15 Min's in the oven.

Now for the sauce. I used about a 2 thirds of the tub of yogurt. Put the yogurt into a bowl and add the garlic. Drain the juices from the passionfruit through a fine sieve and add the juice to the yogurt, no pits please. Lastly a good pinch of salt, a good grind of pepper and mix well. Your done.

Lastly give your rice a good stir and add salt & pepper to taste, then stir through the macadamia nuts. By now your chicken fillets should be cooked through. To assemble, place a good mound of rice in the centre of the plate, top with 2 cooked chicken fillets and dollop with the passionfruit yogurt sauce. Heaven, I'm in heaven. I hope you all enjoy the new recipe I have created?

Cheers Amelita

P.S. Finally tomorrow you should get my chocolate fondue recipe. Yummo!


Wednesday, 7 March 2007

Perfect Pizza


When it comes to Pizza nothing beats homemade. We all would love to have one of those gorgeous wood fired ovens but most of us can only dream of having our own. The crispy bottom is what your looking for and what I was to. A couple of years ago I found and old but new Terracotta tile under my house. Hence I thought, what a great way to retain heat in the oven. So it began.
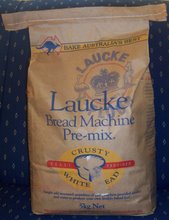
We start with a basic bread dough and I add 1 cup of Polenta or Cornmeal it's the same thing really. It adds a nice flavour through the dough. I also sprinkle it on my tile when it's hot to stop the pizza from sticking to the tile. Gives a nice texture to the crispy bottom of the pizza as well. I then preheat my oven to 210 degrees for a fan forced or 230 degrees for a non fan forced, making sure my tile is in the oven.
Take a piece of dough about the size of a cricket ball or a little bigger if you like. Roll it out into a circular shape as in the pictures above. The dough circle doesn't have to be perfect. It's rustic, that's a good sign it's homemade. Then we add a savoury chutney, spread it all over the bottom of the pizza base. These pizzas, I used a peach chutney, that I bought at the supermarket. Then I sprinkle a nice amount of grated mozzarella cheese. Not to much. Then add your desired toppings. Last but not least slices of baby boccini. The real stuff is much nicer on the top. Lots of stringiness. You can get it at the deli section of your supermarket.
For this pizza we have used cut up cooked skinless sausages, kallamatta olives, pineapple, some cabanossi and of course a sprinkling of chopped fresh garlic, salt and pepper. Transfer onto your tile at the last moment. Each pizza takes roughly 8 to 10 minutes till golden and crispy. They are a great hit for the kids because they can top their own and save you half the work ;)
You can pick up a Terracotta tile at any tile shop and it should only cost you a a few dollars. Alot cheaper than a pizza oven. This does the same job as any pizza place. The best thing is you get exactly what you want and what you paid for.

Monday, 5 March 2007

Chocolate Brownies


I want to introduce you to one of my favourite cookbooks ever.
Betty Crocker's Cookbook
Everything you need to know to cook today.


I bought it in the United States about 6 or so years ago. It's a beauty, for all of you who wonder what's what in the USA food culture. I make Sloppy Joe's, Smokey BBQ Sauce, Cornbread, Southern Fried Chicken, of course Brownies and lots, lots more.
This has to be the best Brownie recipe I have ever used. It simply beats the rest and anyone can do it. They are so delicious, so rich and so much chocolate. I made these with the girls today. I know they're good Brownies, when the kids are just hanging to lick the bowl. The taste explosion begins even before they are baked. Betty Crocker's recipe is a brilliant one and you should try it at home. This is a double batch recipe. So if you only want to make a half batch, just halve the ingredients.
The Ingredients
  1. 230 grams Butter
  2. 300 grams Dark Chocolate Buds
  3. 3 and a half cups of Sugar
  4. 4 teaspoons of Vanilla Extract
  5. 6 Eggs
  6. 2 cups of Plain Flour
  7. Icing Sugar to dust

Heat oven to 350 degrees. Line large slice pan with Baking Paper. Not your normal small pan but one that is twice the size. You can use a roasting tray if you like. Melt butter and chocolate in a saucepan over low heat, stirring constantly. Cool for 5 minutes.

Beat sugar, vanilla and eggs in a medium bowl with electric mixer on high speed for 5 minutes. Beat in chocolate mixture on low speed, scraping the bowl occasionally. Beat in flour until just blended, scraping bowl occasionally. Spread in pan.

Bake for 40 to 45 minutes or just until Brownies begin to pull away from side of the pan. Cool completely in pan on a wire rack. Then dust with icing sugar generously. I cut off the edge pieces because I am a neat freak. But Dave and the kids have those bits polished off fairly quickly. Then cut into squares. I like to eat them with a big glass of ice cold milk.

So easy and they so add to your squishyness, but Who Cares?

Saturday, 3 March 2007

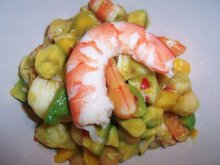
Sesame Seafood Salad

So one of the simply amazing things about living in the tropics is how fresh and stunning the seafood is. I am telling you it is fantastic. I am talking so fresh. Smells like the sea, tastes like the sea and just mouth watering. Photos cannot do this amazing seafood the justice it deserves.
But I tried. I wanted to do something special and something just decadent with it. This is what I came up with and wow, it is so good.


Chopper my personal barman whipped up this lovely drink for me while I was cooking.
Melon Schnapps with Lemonade and a piece of a Tahitian lime. So refreshing.

Look at how lovely these bugs are. So sweet and juicy.


What you need for the salad.

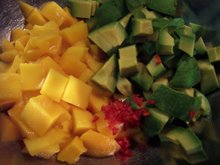
  1. The flesh of 2 Mangoes diced pieces
  2. The flesh of 2 Avocados diced pieces
  3. 1 Hot Chilli seeded & chopped
  4. 2 Moreton Bay Bugs cleaned & chopped into bite sized pieces
  5. 500 grams of fresh cooked Prawns peeled and cut into bite sized pieces
  6. 1 scoop of roasted & salted Macadamias
  7. Juice of half a Tahitian Lime

For the dressing.

  1. Half a cup of good quality Olive Oil
  2. Quarter a cup of White Vinegar
  3. 1 tablespoon of Sesame Oil
  4. 1 tablespoon of Soy Sauce
  5. 2 tablespoons of White Sugar

Put all of the dressing ingredients into a microwave safe jug and place in the microwave for 30 seconds on high. Give it a good whisk and place in the fridge or freezer until it is ice cold. Give it a quick whisk just before adding to the salad ingredients. Mix desired amount of dressing with all the salad ingredients and serve. It's that easy. Serves 4 and your in heaven. I hope you enjoy it as much as we have :)

Tuesday, 27 February 2007

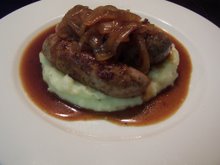
Sausages, Brown Onion Gravy & Mash


Are these not gorgeous looking sausages? Chunky Lamb and Hand Cut Italian. I got them at a butcher in Belgian Gardens, Townsville. This is the best butcher I have ever seen. They have so much quality meat and gorgeous ideas. I will be doing a post on them soon for you.


This is an old favourite with my own personal touch. My family just loves it and it is real home comfort food. It is very easy and a sure fire winner.
All you have to do is make mash potatoes the way you like them. I like them with a good knob of butter, a good splash of cream, salt and pepper. Start your sausages off in a fry pan that has not been preheated with a splash of olive oil. Bring them up to heat slowly, fry them until they are cooked all the way through. Turn up the heat and let them brown. Remove from pan and keep warm, or zap them in the microwave for 30 secs before plating up. Now for the gravy.
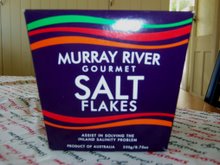
Fry 3 brown onions, 2 shallots and 3 cloves of garlic with a good pinch of salt flakes, in the fry pan you used to cook your sausages. If there is to much fat in the pan from your sausages, drain a little bit away. But remember, fat is flavour, and it is nice to have the residual flavour from the sausages in your gravy. Cook until nice and caramelized. Add 500 mls of cold water and bring up to the boil. Reduce liquid by half. Then add 2 tablespoons of Brown Onion Gravy Mix or similar, 1 tablespoon of Worcestershire sauce and stir well. Allow the gravy to bubble and thicken. Taste for seasoning and your done.
To plate, just put a good blob of mash on the plate, place desired number of sausages on the mash. Then top with a generous amount of gravy. This gravy also goes well with roast beef and Yorkshire Pud. I hope you like it. Can you tell we are making up for all that road food?

Sunday, 25 February 2007

Beef Wellington & Salad


I love Beef Wellington. There is something just a bit special and sophisticated about eating a Beef Wellington. I have always felt a bit intimidated by the thought of actually making them. They seem so delicate, so classy and scary to make for the average cook. Silly Hey? But that's how I felt about it. Some things, stupid recipes I have issues with trying. There is no reason for it, just the fear of failure may happen upon me. I don't like to cook bad food or make mistakes in the kitchen. I am a perfectionist. It is the same with Chocolate Mousse. I don't know why, can't do it and wont go there, just yet. I remind myself that I don't want to end up like one of those people on that TV show Maury Povich. Afraid of alfoil and kittens or even stupider things like, butterflies and sunflowers. C'mon, sunflowers really? Sorry I have digressed again. So I did it and they turned out fantastic. No recipe, just what I had seen on TV and cooking mags. I felt my way through the process and hopefully this is just a stunner of a recipe for you, as it was for us.
I started with bought puff pastry sheets, then some excellent quality fillet steak, 500grams of mushrooms and a couple of cloves of garlic. I placed 500mls of beef stock into a saucepan with 1 cup of red wine, 2 tablespoons of balsamic vinegar and a tablespoon of brown sugar. I brought these to a simmer and reduced the liquid to a syrupy consistency. Then I allowed it to cool. While that was reducing I had finely chopped the mushrooms and garlic. I fried them in a pan with a splash of olive oil and a good pinch of salt flakes, once all the moisture has evaporated from the pan remove them to cool also. Then mix the sauce and the mushrooms together.
Then you need to sear the fillet steak quickly, on each side, in a fry pan. I'm talking quick high heat. In and out. Allow them to rest while you arrange your pastry. Arrange the desired amount of sheets on your bench top and your set to go.
Place a dollop of the mushroom sauce in the centre of each sheet. Then place a fillet on top of each one. As you can see by the pics. You need to cut the corners out of each sheet of pastry. Fold them in like wrapping a present and use the discarded pieces of pastry to decorate. You can brush with egg yolk or spray with olive oil lightly. Bake in a fan forced oven on 200 degrees or 210 degrees for a non fan forced. Bake for 15 to 20 Min's or until pastry is golden. Serve with a nice green salad, ranch dressing and croutons.
Gee they were scrummy. I surprised myself yet again. The sauce was so rich and flavourful. The pastry was so crisp and buttery. The steak just pink in the middle and so tender. It melted in your mouth. Chopper nearly wet himself (lol). We loved them. Ohhhhhhhhh ahhhhhh yummo. I am telling you, you must try them. So not so scary after all. Sorry Maury but you will have to find someone else for your show. http://www.mauryshow.com/

Saturday, 24 February 2007

Friday, 16 February 2007

Thursday, 15 February 2007

Wednesday, 14 February 2007

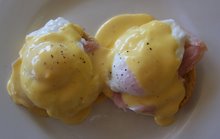
Anal Eggs


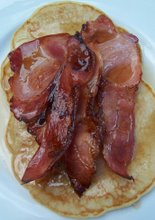
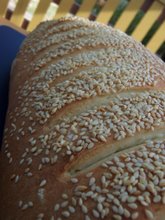
See now, who says you can't have brekky at dinner time. For some odd reason I have been craving eggs at dinner time. Why is that? Maybe I am lacking in some type of protein or something. I don't know. This gave me the fix I wanted, also used up some more food in the fridge before we leave for Townsville on Friday. Thick sour dough toast, fried mushies in garlic, par fried poached eggs, grilled crispy bacon and those gorgeous little pork sausages. What more could you want?
The eggs were a new method I tried, that I saw on Melting Pot on Lifestyle Food. They were not as soft as I normally like them. So I think I will give it a miss next time. The method is to place oil in a hot fry pan and just add as many eggs as you require. You fry them for a minute, you add a tablespoon of water, pop a lid on the top and cook them for a couple of minutes, so the tops are poached. They come out like a dinner plate egg shaped feast. Then you cut them into individuals and Walla your done.
When it comes to cooking eggs, I am totally anal. I like them the way I like them and that's it. I cannot even stand them slightly overcooked. But I hate the whites runny. So there is a fine line between when they are ready and disaster for me. I bought myself a little fry pan ages ago with a little lid, on recommendation by the chef at the Sheraton on Hyde Park in Sydney. He actually taught me. Yes, at the brekky buffet in front of everyone. But who cares. They come out perfect every time. The lid creates a lovely steaming effect with the eggs and they set perfectly on the top. Gorgeous runny yellow in the middle. The fry pan is the perfect size for two eggs.
I am not the only person who is anal about their eggs. There are heaps of us egg freaks out there. We must go through 2 dozen at least a week. Not all fried and poached of course, but through the course of lots of baking and other things like sauces. Without the humble egg I think I would be lost when it comes to cooking. I love them :)

Saturday, 10 February 2007

Well Looky What We Have Here!


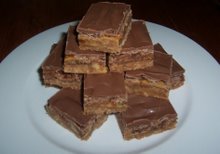
These photos were taken by Little Miss Moi. My new friend that is living in Kyiv, Ukraine. She has vision and spunk. Honestly her blog just totally makes me laugh. She is a fellow Brisvegas girl, missing home lots and lots. Little Miss Moi has made my Mars Bar Slice over there with one difference, Little Miss Moi has used chocolate condensed milk. Awesome. I have never heard of it and if anyone knows where I can get it in Australia, please let me know? Little Miss Moi just couldn't tell whether it was cooked or not, due to the fact that the chocolate condensed milk was already dark in colour and she had trouble telling whether it was gold and bubbly. A little under done, but herself and Mr Moi loved it anyway. Well done Sunshine :)
Please check out her blog. It is an excellent read and it makes you feel like you are there with her. This very intelligent and fabulously funny woman has created a fantastic blog for us to share and I urge you to have a latte, a piece of Mars Bar Slice and sit back and enjoy the magic that is Little Miss Moi!
This is my favourite post of hers so far,
Don't go to Australia. It's too dangerous
Cheers and I hope you laugh like I did :)

Thursday, 8 February 2007

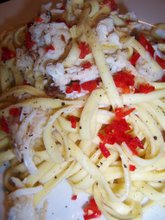
Lemon Pasta Alfredo with Prosciutto & Eschallots


Jingilli Olive Oil - I adore it!

I have never made this before. First time fluke.
I wanted to do a fresh twist on an old classic.
I think that I achieved it tonight.
This was so easy and tasted gorgeous.
The layers of flavour that came through my mouth as I devoured it.
Just stunning.
If I do say so myself.
  1. 500gms Orecchiette Pasta
  2. 400mls of Thickened Cream
  3. 1 cup of finely grated Grana Padano Cheese
  4. 2 teaspoons of finely grated Lemon Rind
  5. Juice of half a Lemon
  6. 8 slices of Prosciutto cut into shreds
  7. 1 cup of chopped Eschallots
  8. Shaved Grana Padano & a good drizzle of best Olive Oil for presentation
  9. Salt & Pepper

Big pot of boiling salted water to start. Throw in your pasta to cook and give it a good stir. Cook until aldente. In a heavy based fry pan pour in the cream, add a good pinch of salt flakes and a good grind of black pepper. Bring to a simmer slowly. When the cream is simmering add the grated Grana Padano, grated lemon rind, lemon juice and simmer for another two minutes or so. Sauce should not be to thick in texture. Taste for seasoning. Drain pasta well. Stir all of the sauce into the pasta with the Prosciutto, Eschallots and allow to sit for a minute so that the pasta is able to absorb some of the sauce. Dress with shaved Grana Padano and drizzle with good olive oil. We added extra ground black pepper at this stage. We love lots of pepper. As they say in Top Chef, we are pepper monkeys ;) Serves 4. So Easy. Enjoy.

Wednesday, 7 February 2007

Mars Bar Slice - My Way


I know I have been promising you this recipe for a while now. So here it is. It is fantastic. It is always gone before I know it and it is extremely fattening, which I love and goes great with a latte. I hope you enjoy as much as my friends and family do? So Easy :)
  1. 4 Mars Bars ( I like the king size because I am a chocoholic) sliced into pieces.
  2. 1 Tin Condensed Milk
  3. 1 Packet of Chocolate backed Scotch Fingers ( I use home brand, makes no difference)
  4. 100 grams melted Butter
  5. 300 grams melting Choc Buds ( dark for the adults)

Preheat oven to 180 degrees Celsius. Crush biscuits and then add melted butter, press into a slice tin. Arrange Mars Bar pieces on top of biscuit base. Pour over evenly tin of condensed milk. Do not lick the lid OK. I know it is tempting but it is really dangerous for your tongue. Trust me, I know. Bake in the oven for 25 to 30 Min's, until golden and bubbly. Allow to cool and refrigerate. Then melt the choc buds in the microwave on a medium setting ( 450 watts) Allow to sit until the chocolate sets. Then cut into pieces. I always cut of the edges off so that the slice pieces are even and pretty. Don't worry there is always someone around to take the edge bits of your hands. Refrigerate and eat at will. I have absolutely no idea how long it lasts in the fridge, as it disappears like magic. Enjoy. So Easy :)